TODAY'S HEADSHOTS ARE NOT YOUR PARENTS' HEADSHOTS
Professional and personal headshots are used in both our professional life as well as our personal and digital life.
Weather its for your business website and social media, marketing purposes, or for your dating profile, media presences, or social media, headshots are the first thing others will view. A personalized head shot is the perfect way to stand out from the crowd.
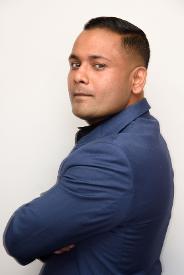
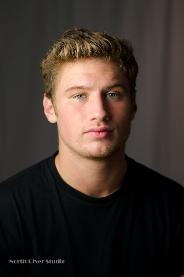
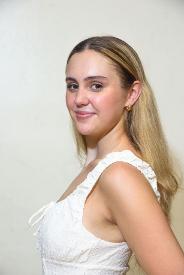
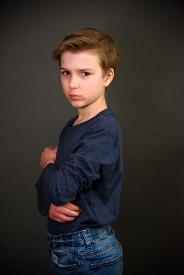
We offer a discount on headshots that are perfect for your social media, dating websites, or professional digital media. For one low price, you can create headshots to match your personality or profession. Stand out with professional headshots. Shoots take about 20-30 minutes and can incorporate a number of poses or outfits. They can be taken at our white box studio in Peekskill, your home, or any of the wonderful backgrounds the Hudson Valley has to offer.
Contact us today to schedule your low cost headshots.
What are professional headshots used for?
-
Company Websites and Blogs.
-
LinkedIn Profile.
-
Online Social Media Profiles, i.e. Facebook, Instagram, YouTube, & Twitter.
-
Online Publishing.
-
Emails and Email Marketing
-
Business cards, brochures & marketing literature.
-
Magazine articles & newspapers..
-
Press Releases.
-
CV's & Resumes.
-
Personal Branding.
It the FIRST IMPRESSION of YOU!
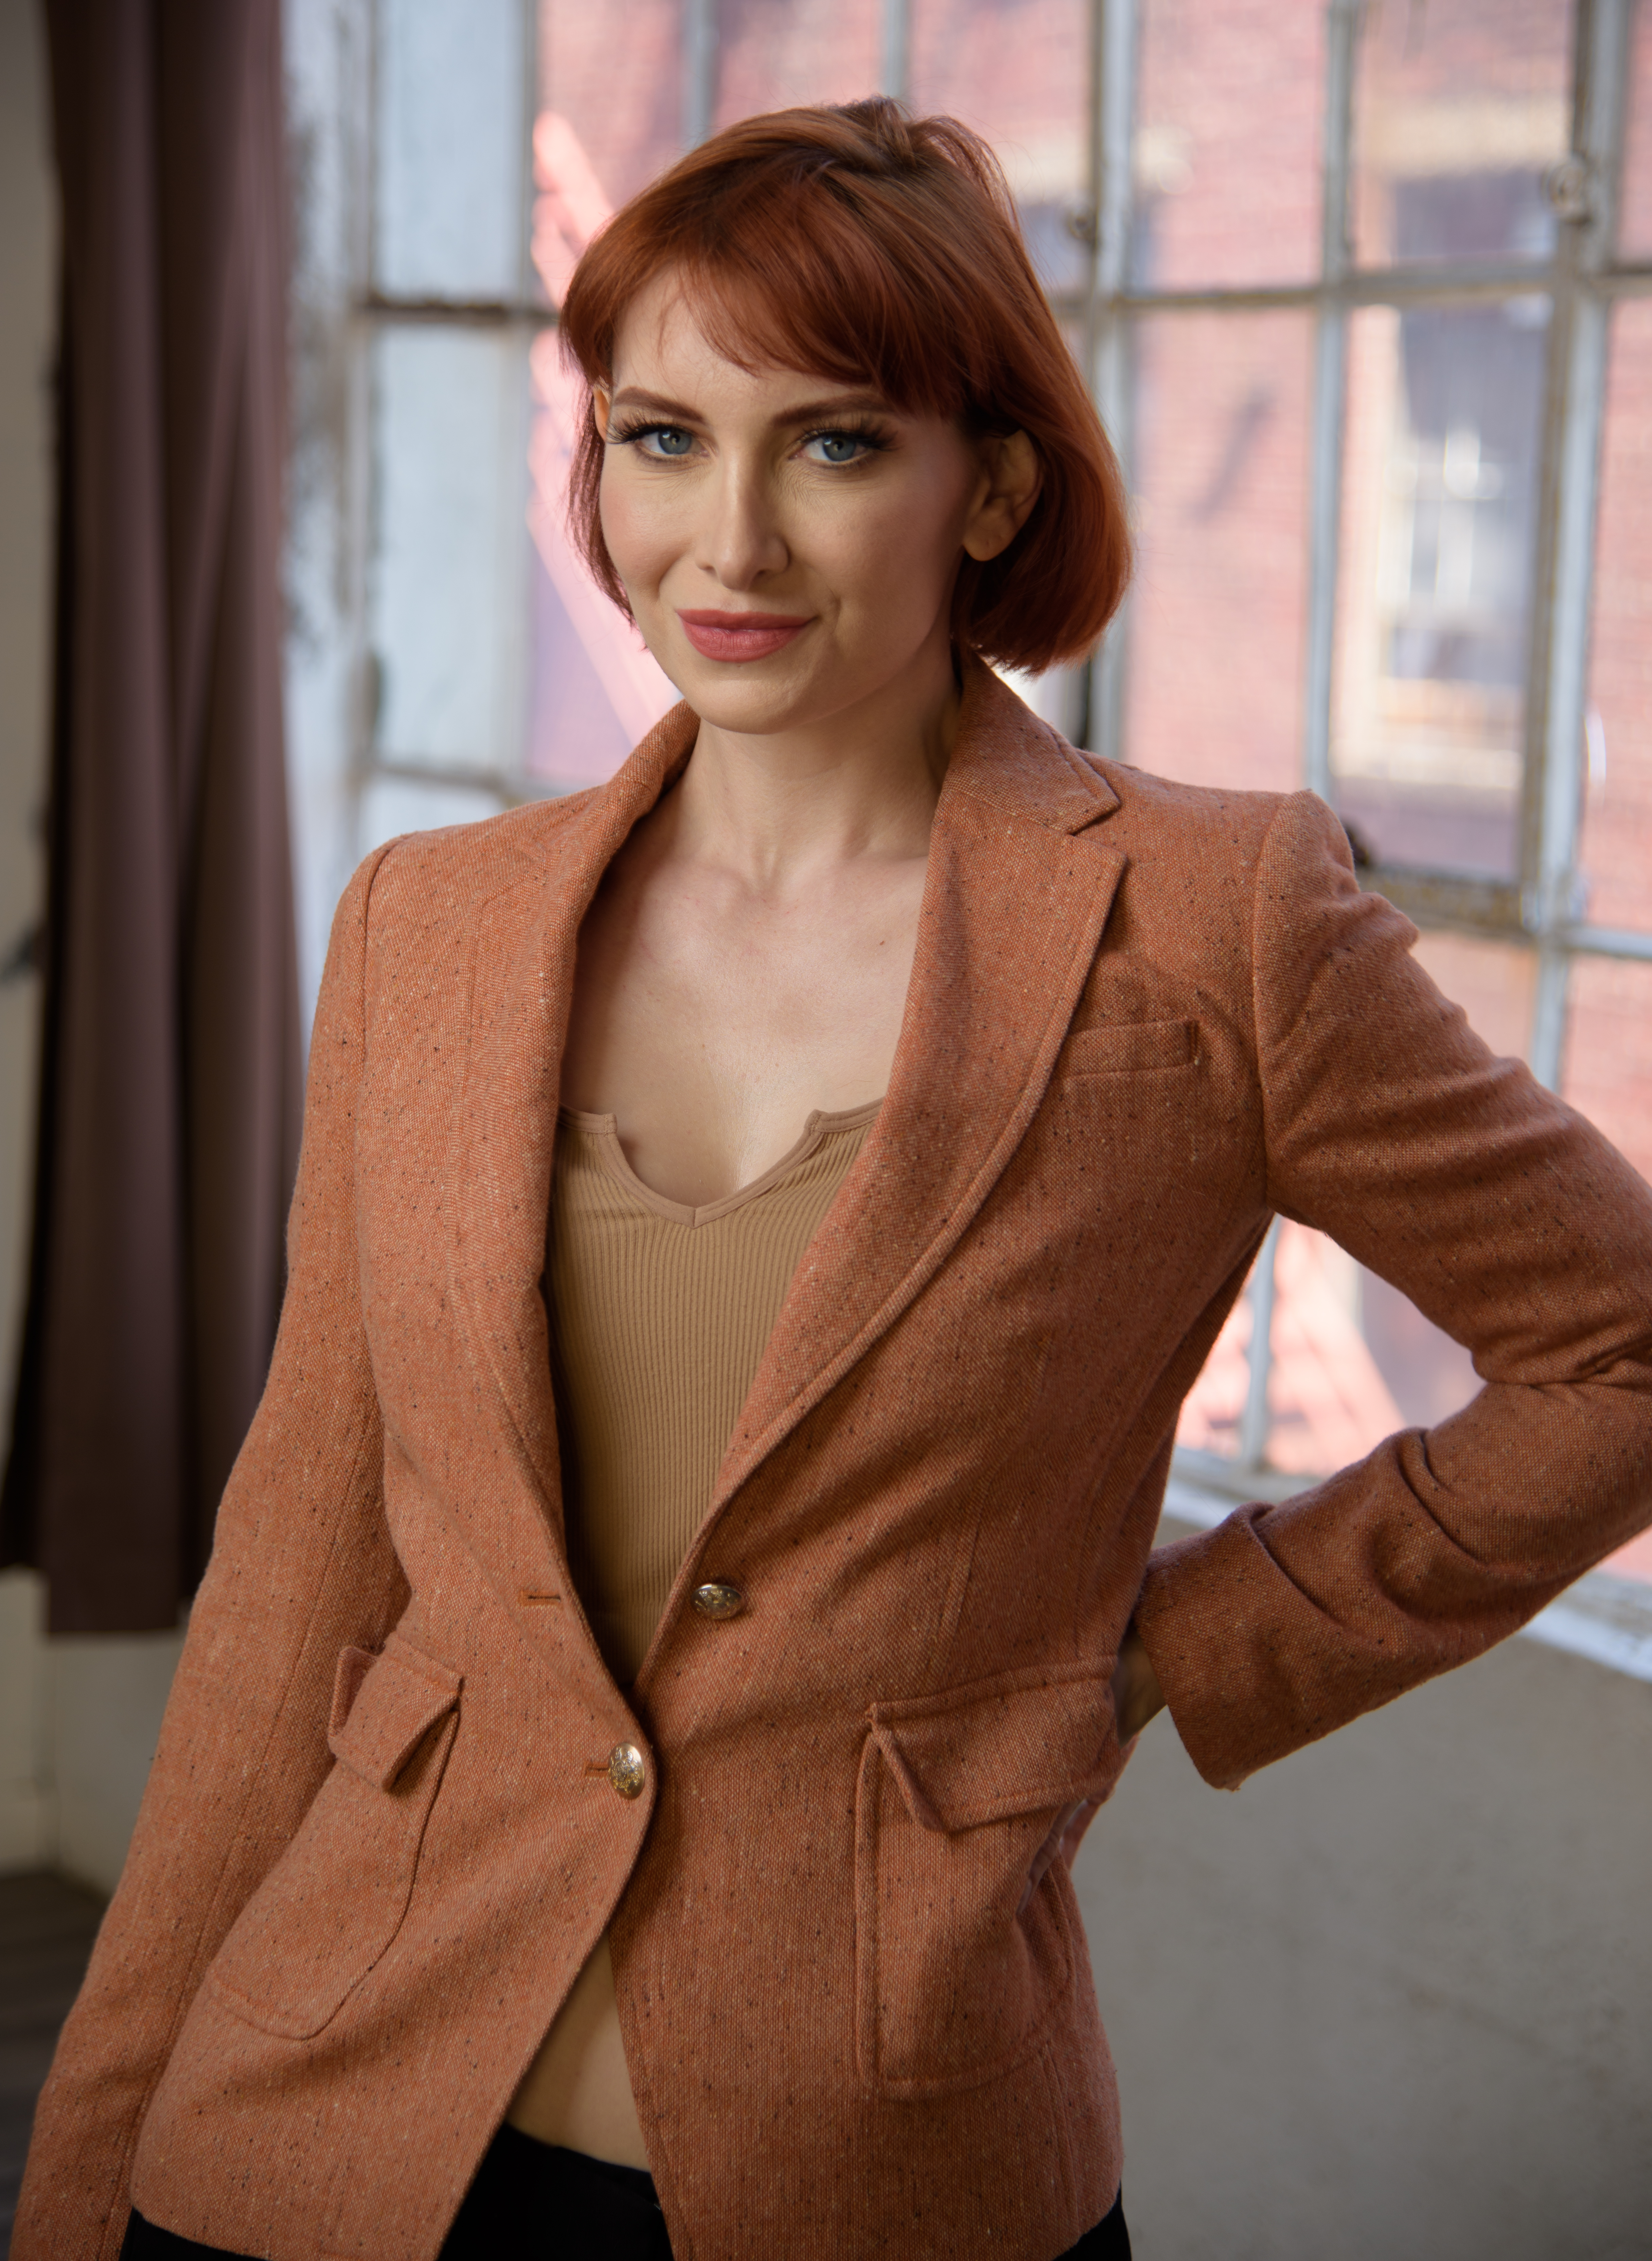
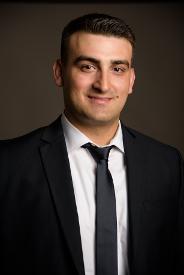
And that first impressions count! Whether your marketing your business, building a social brand, or just sharing news on social media, the first impression you will make will be with your headshot.
For businesses, a professional headshot has become essential. Studies have shown that people reviewing websites are drawn to people they can see and relate to. That's why its so important to Customize your Headshot...a banker, elementary school art teacher, musician, and fashion model, should not have the same type of headshot. You can make an strong and influential impact on your target audience before you even meet them or speak with them. Your competition is already doing it, you should too,
At North River Photography, we have the expertise to help you create YOUR PERSONALIZED headshot, so you can convey the look, feel, and personality to have the maximum affect on your audience. Its EAST and takes no time.
At North River Photography we encourage you to bring a few different outfits, so we can capture your personal headshots, your dating site and social medial photos, and take your professional business shots -- all in one sitting for the same LOW price.

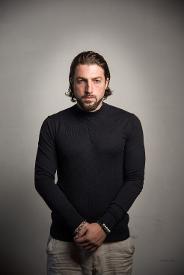
Every head shot session should have a theme or themes you wish to capture during your shoot. Choosing the outfits that fit your taste and style is only the first step. At North River Photography, we always recommend that you bring a few tops or accessories, so you can capture your portraits that can suit your different needs. For a timeless look, we recommend that one of those tops be a neutral primary color, so it will never look out of style.
The second consideration should be the location of your shoot, and what backdrops or backgrounds you’d like to use. Today’s head shots do not have to be limited to the black, white, gray backdrop of traditional head shots. A beautiful natural background, a home library, a field of flowers, or even a city street corner can make for a wonderful head shot background. At North River Photography, we have portable black and white backdrops that can easily be set up anywhere in minutes, so you can have a home or outdoor photo shoot, and still take shots with the look and feel of a traditional professional photography studio. It’s like having two completely different photo sessions at one time.
There are also many styles and lighting setups for head shots. Each one evokes a different feel to covey the right message you want to send with your head shots. A brief description of the different head shot lighting techniques is discussed below. An experienced photographer can guide you in choosing which styles work best for you.


Rembrandt Lighting Headshots
The traditional headshot or portrait lighting set up is called “Rembrandt lighting.” Rembrandt lighting refers to the lighting techniques popularized by Dutch Golden Age painter Rembrandt Harmenszoon van Rig (known mostly as simply Rembrandt). Many of Rembrandt’s portraits featured a subject (or subjects) in a room lit by a single window that was above and to the front and side of the subject. Often, the window as unseen in the painting, but the cascade of light on the subject revealed its location. This lighting technique, with the main light slightly above the subject, and about 45 degrees to the left or right front of the subject, casts a pleasing light on the subject’s face. By using this technique, one side of the face is well-lit, while the other side is a bit more in the shadow, thus creating dimension to the facial features and giving the face an overall depth of field. As an added bonus, because the bridge of the nose is narrower toward its base, the light from the Rembrandt lighting shines upon both eyes, thus allowing them both to be the focal point of the portrait.
Using Rembrandt lighting also allows for good placement of the catch light (the glint of light reflected in the eyes). Because the main light is to the side and front of the model, and above the model’s head, the catch light is reflected in the dark part of the eye, above and to the side of the pupil. The nicely placed catch light adds a sparkle to the model’s eyes.
Studio photographers often employ this technique to capture the headshot or portraits of their clients. By adding a reflector opposite the main light, the photographer can decrease the contrast between the light and dark side of the face, while still maintaining a suitable contrast. Moving the light toward front of the model, the photographer can also used the light to wrap around the model’s face, so that the desired tone of the face can be achieved. To increase the contrast and highlight the client’s facial features, chin, and eyebrows, a photographer will often add a grid to the light source to harness the light and prevent light from spreading across the face. Using a grid also keeps the light from spilling onto the backdrop or background, and gives a nice separation between the client and the background.
A skilled photographer may also enhance the lighting with a “hair light” (also called a “rim light”) or rear lighting. By shinning a lower intensity light on the back of the client’s head and hair, a soft glow will be achieved, which helps provide separation between the model and the background. This is particularly useful if the model has dark or black hair, and is standing in front of a dark background.
Rembrandt lighting can be used outside as well. You may have heard of what photographers call the “golden hours” for outdoor photography. These golden hours is when the sun is about midway between the horizon and the zenith. The occur in the mid morning and mid to late afternoon. The reason they are called the “golden hours” is because the sun is less harsh and comes at approximately a 45 degree angle. Essentially, the sun is giving the surface of the earth (at your location), Rembrandt lighting. By having your client or model turn partway toward the sun, so its off his or her left or right side, you can create beautiful Rembrandt lighting without any flashes or strobes. It is advisable, however, to have reflectors handy to either reduce the harshness of the sun by diffusing its light, or to reflect the sun’s light back at the model as a hair light.
One drawback to using the sun for a natural Rembrandt lighting technique, however, is that you are limited to your choice of backgrounds. Because the sun has to be to a front side of the client, you cannot take photographs with the background in the same location of the sun. If the sun is behind a grand bridge or beautiful building, the client cannot stand with his or her back to the bridge or building and achieve natural Rembrandt lighting. Choosing your location and the time of day for your shoot, therefore, becomes critical.
A second drawback to using Rembrandt lighting outdoors with the sun, is that with the sunlight coming at your client at a 45 degree angle, it tends to get in their eyes and cause them to squint. If this happens, one solution is to have them close their eyes until the moment you take your shot. Be sure to emphasis that the eyes should stay large and bright for the moment your camera lens is open. If your client wears glasses, be sure that their head is turned in a direction that the sun does not cause a glare or reflection in the glasses, as this could ruin an otherwise great shot.
To obtain a natural looking Rembrandt lighting portrait when the sun is not cooperating, professional photographers use powerful strobe lighting with high speed sync to mimic the sun. By using a very fast shutter speed and low ISO, the photograph can block out all the ambient light and capture the client’s portrait using only the light from the strobe. If the sun is low enough to the horizon, the sun can be used as a backlight, or hair light, on the model. One thing to avoid, however, is capturing the sun high above (and behind) the client or model. With the model well lit from the front, but the sun seen behind the model, it’s a tell-tale sign that the photographer used artificial lighting. While the end result may still be fantastic, it will not have that “natural” feel to anyone with a discerning eye.
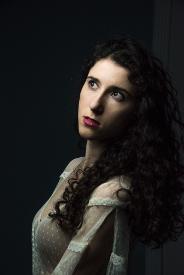
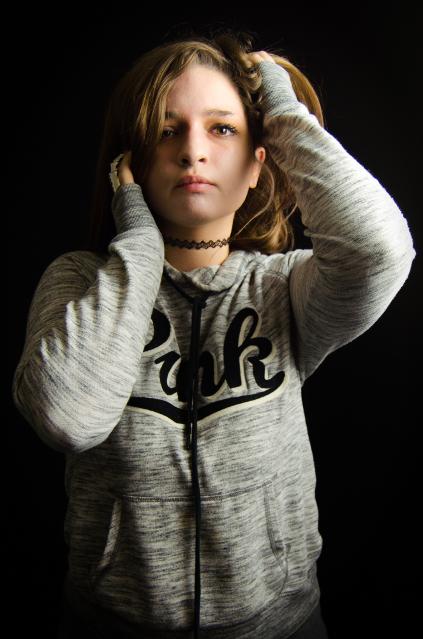
Low Key Headshots
For a more “moody” or serious headshot, clients can also choose a low-key portrait. Low-key lighting creates a contrast between deep shadows and light. Unlike high-key portraits, where light saturation is the goal, low-key lighting uses focused lighting to highlight key features of the client’s face, while leaving the rest of the fast in deep shadow.
Low-key portraits uses limited directional lighting and a high shutter speed (with low ISO). The high shutter speed and low ISO blocks out the ambient light, allowing the photographer to control exactingly where the light falls on the model. Low-key portraits are perfect for high clarity shots, where the goal is not to hide the creases and wrinkles on the face, but to emphasize them. Low-key head shots are perfect to covey the seasoned look of a serious business man or woman. They show someone who has been there before, and know how to play the game. Someone whose experience is written all over their face. The dark moody lighting setup allows for a serious, no nonsense look.
Of course, low-key portraits can be just as fun, playful, and “smiley” as other headshots. The difference, however, is that the person is covered by, and surrounded by, deep shadows. Low-key photographs are perfect for that “film noir” look of the old black and white detective movies, with the light filtering in through the blinds to a grisly looking man sitting on a chair with a fedora hat on his head, a glass of half-drunk bourbon in his hand, and old 38 caliber revolver sitting on the table beside him with a thin line of smoke trailing from the barrel. While this may not be the exact look you’d want for your head shot (or maybe it is), the possibilities that low-key portraits can provide are far and wide, and can allow you to create your own personal head shot that will stand out from the rest.
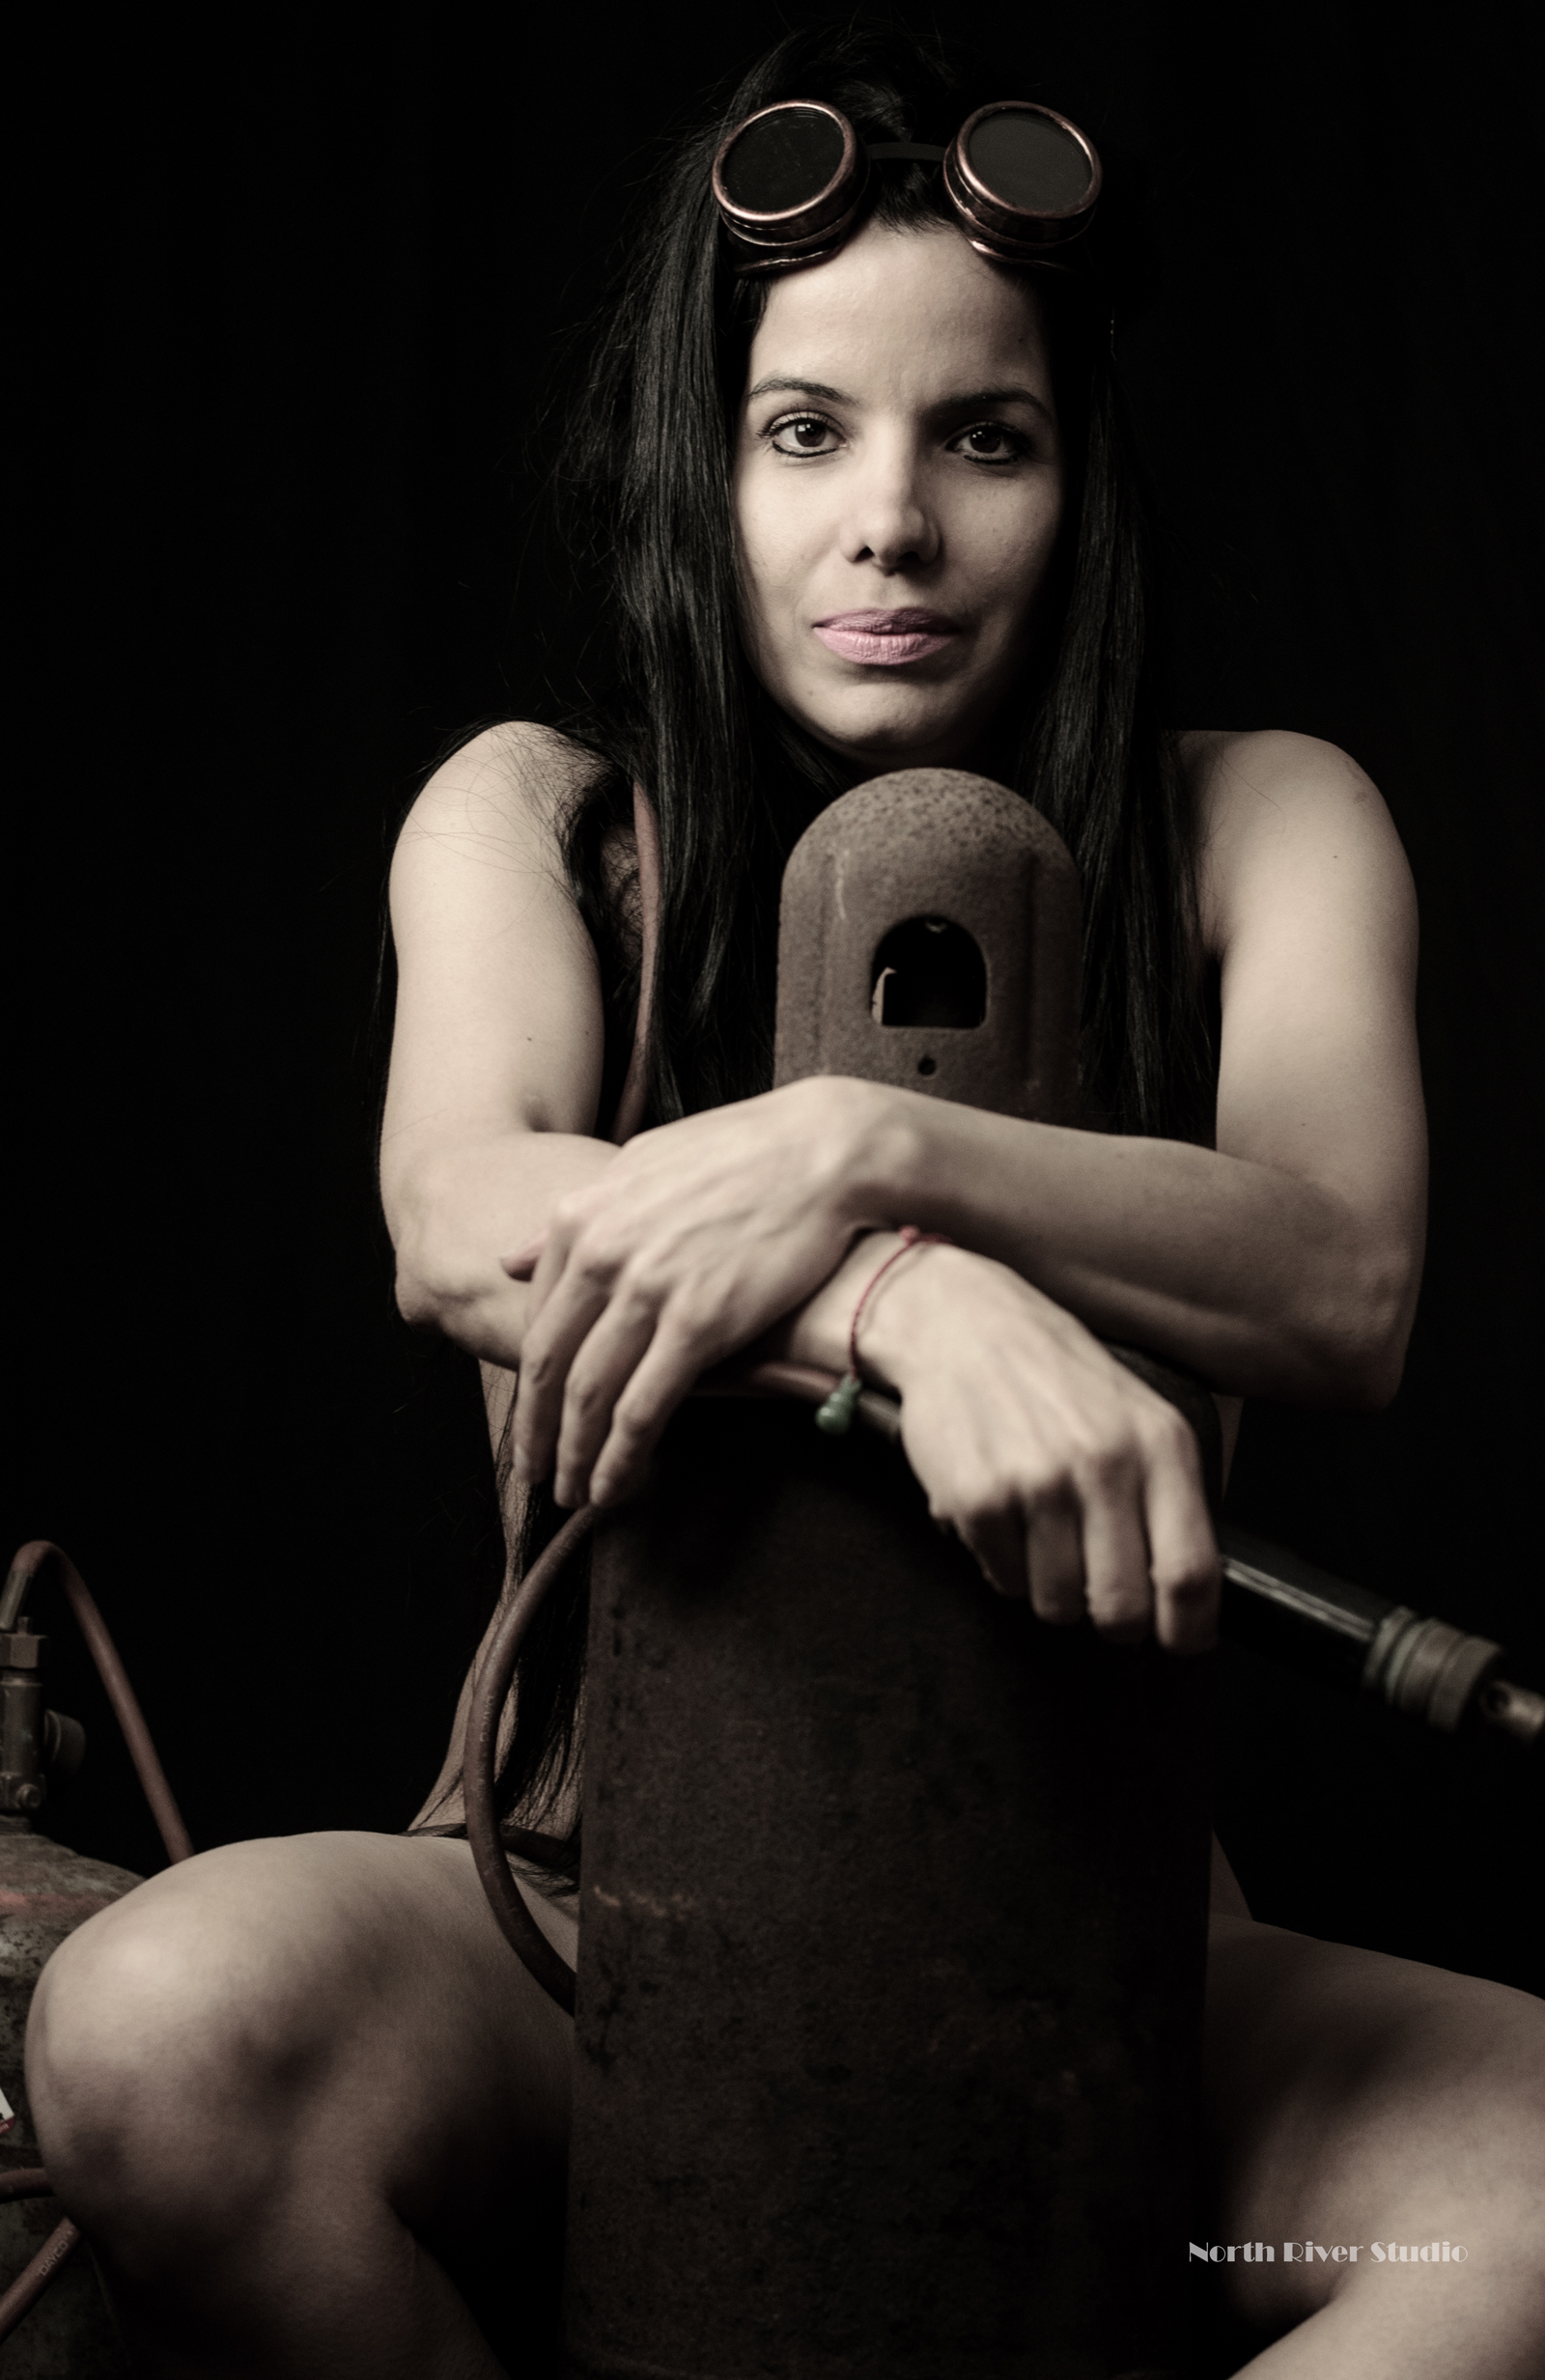
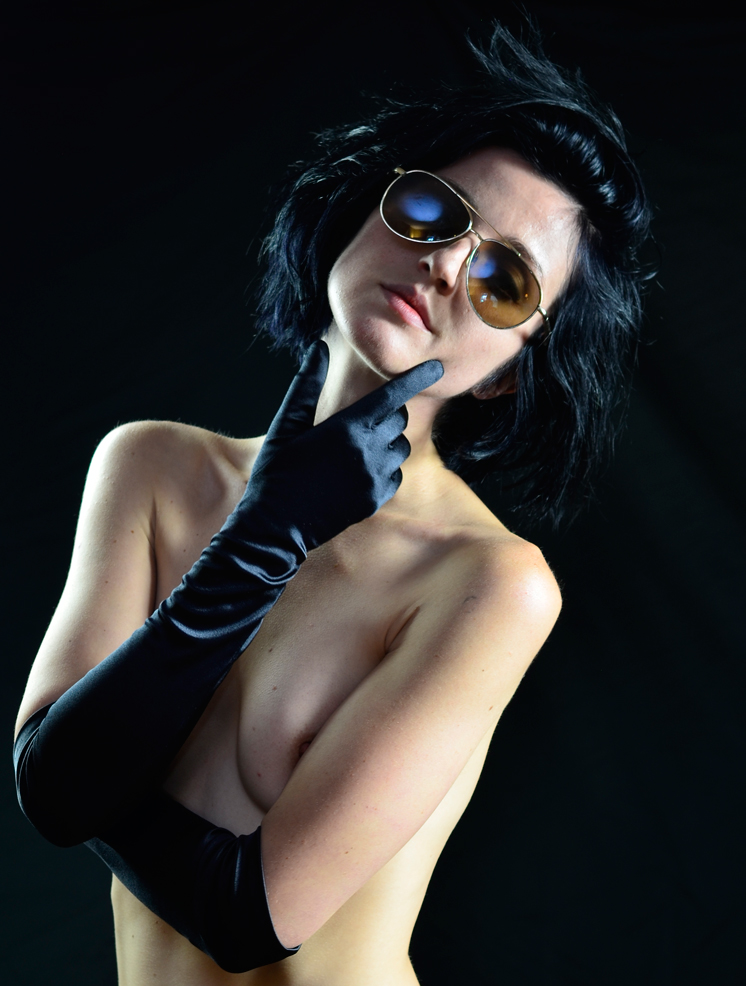
Low-key portraits are also usefully in conveying a mysterious or sexually enticing feel. For implied nudity portraits (where the model is nude, but the body is covered from exposure), a low-key lighting setup is perfect for using the deep shadows to hide from view the otherwise exposed body parts. This can work well for implied-nude headshots. Implied-nude head shots are simply head shots that suggest some level of nudity, but leaves the suggestion unanswered. Using low-key lighting to expose a bare shoulder, or a side of the chest or breast, can be both innocent and enticing at the same time.
Low-key portraits typically have a dark background, but they need not be entirely black. With the ambient light “turned off” (high shutter speed and low ISO), almost any background would work well with low-key lighting. Clients can subtly include in their background references to their work, hobbies, or activities they enjoy, and because they will be cast in shadows, they will not distract from the main focus of the portrait: you.
Low-key headshots can be taken almost anywhere and at anytime. Because the background is in deep shadows, many clients mistakenly believe that they can only be taken outdoors at night. This is not true. While there are many benefits to taking night portraits outdoors, like using the night sky or lit buildings as a backdrop, a professional photographer can take low-key headshots on a sunny beach at high noon. Using a camera capable of extremely fast shutter speeds (1/8000 of a second) and powerful high speed sync strobes, a professional photographer can essentially “turn of the sun.” Once the sun is “turned off,” the lighting for the shoot is in the complete control of the photographer. From there, the photographer can use any outdoor setting as his or her own professional studio. This is perfect for the person who works outdoors, as they can have their low-key headshots taken right at the worksite, and even incorporate any of their equipment or tools into there shots.
Low-key headshots are a great compliment to any head shot portfolio. At North River Photography, we always encourage our clients to take headshots in a few different styles. The photograph you chose for your work website, may not be the one you’d like for your Facebook profile or dating site.
Clam Shell Lighting Headshots
Clam shell lighting is a popular two-light technique for head shots, because the result of the lighting allows the person to “pop” out from the photograph. The main large light is set up above and slightly in front of the client. It should be far enough in front that the light wraps under the eyebrows to avoid having the “racoon eyes.” The second light (or a silver reflector) is set up below the main light, usually around waist high on the client. The second - or bottom - light should not directly reflect the light on the client. Instead, it should point straight up, as if illuminating the air in front of the client. Because of the wide dispersion of the second light (or reflector), the light will cascade under the chin, nose, and eyes of the client. The end result is a bit of a glow, or brightening, of the client’s face. This technique works well with studio backdrops, but can be equally compelling in a home or office setting.
Clam shell lighting works well when photographing a large number of people with the same basic setup, like you would for a company who wants corporate headshots of its employees. The simple and effective clam shell lighting allows taking great headshots of a number of people with little lighting manipulation required between shots.
Because of the required overhead lighting, clam shell lighting is not usually suitable for outdoor photo shoots. Even when the sun is straight overhead (or as close to it), the lighting from the sun is typically too harsh to avoid the “racoon eyes.” Using a second light or reflector, however, to fill in the shadows under the chin and neck is a technique taken from clam shell lighting technique often employed by professional photographers during their outdoor shoots.
High Key Headshots
A skilled photographer can provide you with perfect high-key headshots that evoke the glamour and mystique of movie stars from the roaring 20s to the 1960. Black and white high-key head shots became popularized as the perfect head shot for movie actors and actresses since the early days of Hollywood, and they have retained their glamour ever since. The benefits of a high-key head shot is that the saturation of white light removes the shadows created by wrinkles and creases. By removing the shadows, the wrinkles themselves are removed, leaving only the soft white glow of the skin. When you imagine a makeup mirror, you will inevitably think of a mirror surrounded by lights. The same type of mirror that is backstage on Broadway or in a dressing room. The reason the mirrors are surrounded by lights, is so that your reflection in the mirror comes back as “high key.” The lights surrounding the face removes the shadows caused by wrinkles and creases, and the reflection is the “perfect” Image of your face. To this very day, the majority of fashion magazine photographs, catalog work, brochures, and billboards, are taken in high key.
The trick to high-key portraits is to know the difference between “light saturation” and overexposure. In order to bring a saturation of light to lighten out the creases and wrinkles (especially around the eyes), high key headshots uses multiple light sources which surround the individual and shine light in all directions. The light, however, should never be overexposed. Too many inexperienced photographers mistakenly believe that simply overexposing the portrait creates a high-key head shot. It does not - it only creates an overexposed photograph that is neither appealing to the client, nor indicative of a professional headshot. An overexposed photograph flattens the image, and removes all color from the skin. It also bleaches the eyes and looks entirely manipulated. A quality high-key headshot is one that simply saturates the face with light, while keeping the sparkle in the eyes, the color in the hair, and the tone of the skin.
To create a high key portrait, a photographer will use a plethora of different lights that saturate the client’s face at different angles and with different intensity. By using different light sources and different directional angles and light brightness, a photographer can capture the full three dimensional features of the face and allow it to “pop,” while still covering the shadows. Light placement is key, as the main feature of any portrait is the eyes. Improper light placement, and the lights will all reflect in the client’s pupils and wash out the eyes. Keeping all the lights off to the side, however, and the eyes will lose any “catch light” (the appealing glint of light reflected in the eyes). The placement of the catch light is critical to any headshot. The ideal spot for a catch-light is above the pupil (to either side), but within the colored area of the eyeball. Too many photographers sacrifice the ideal catch light placement in their quest to saturate the client’s face with light.
Then angle of the face and head is also critical for a proper high key headshot. As light naturally emanates from the sun, we are accustomed to having the light coming down upon us. Anything different strikes us as unnatural. Think for a moment why shining a flash light under your chin makes your face look scary, but standing outside at noon (with the light coming directly down on you) does not have the same scary effect. It is because we are accustomed to seeing people with an overhead light. Because of this “natural” expectation, a great high key head shot is one where the angle of the face is titled upward, as if the light is coming from the sun. The same shot with a downward angle has an unnatural feel to it, even if the viewer of the photograph does not know, or cannot explain, why it looks unnatural.
Another form of high-key headshots is created using “bow tie” lighting. Popularized by the famous actors and actresses of early Hollywood, the bow tie lighting set up uses a stronger overhead light that shines down on the upturned face. Using reflectors, the photographer then fills in the shadows under the chin and the forefront cheek. The signature result is a glamour high-key shot that was used on marques and broadsides to advertise the actors’ or actresses’ movies. The name “bow tie” lighting comes from the small bow tie shaped shadow that falls under the model’s nose. The downward angle of the main slight source casts the shadow created by the nose and nostrils onto the upper lip of the model, creating a signature bow tie shape.
A light or white background is also important for a high-key portrait or headshot. The white or light colored walls help reflect and scatter the light in all directions. In this age of selfies, many people may have noticed that the mirror shot of themselves in a large white bathroom gives their skin a nice glow. That bathroom mirror shot was so successful because the bright light from the bathroom reflected off the white walls and created a saturation of light -- basically, a high-key shot. The larger the bathroom, the more the light reflects and re-reflects, so the cascade of light provides for a great high-key shot. Unfortunately, large bright bathrooms seldom have desirable backdrops for obtaining your perfect high-key shot. A photography studio, however, does. While a light background is key, a professional photographer can offer more than the standard white wall. Adding texture to your background makes the photograph more unique and interesting.
Another great option is to have a high-key outdoor photo shoot. Using any light colored background (even the sky) makes the high-key portraits even more amazing because it takes away the obvious professional photographer from the photo. As noted above, most fashion magazine and catalog work is done in high-key. There is no limitation to the outfits you could wear, or the location to have them taken. High key photography is used in everything from beach settings, city shots, to outdoor barbecues. Because you are contenting (and often competing) with the sun, to create a high-key shot outside you need strong powerful lights capable of high speed sync flash (multiple flashes during the duration of the lens opening) and a camera with shutter speeds of at least 1/2000 of a second. Using powerful strobes and flashes, the professional photographer can recreate the studio saturation of light in your backyard, at a local park, or anywhere you can think off. At North River Photography, we use powerful strobes and large (7 foot wide) parabolic umbrellas to bring a saturation of light anywhere. Even an old graffiti covered cement wall can look like a finely textured backdrop when it is covered in white light.
High-key headshots work for people of all ages and skin tones. Saturating the model’s face with light brings out the natural glow of the face, and removes all skin blemishes, discolorations, and wrinkles. Unlike a Photo-shopped picture, a high-key portrait does not have the tell-tale signs of post-imaging blurring of the photo or the addition of filters. The reason is simple: Became there is no electronic manipulation of the image. Using high-key lighting, the photographer simply captures the true image of the client in the best possible light.
There are many uses and applications for high-key portraits. As noted above, they are perfect your professional headshots, company brochures, your personal web pages and blogs, dating sites, or your own social media. Contact us today to discuss how North River Photography can help you obtain your perfect high-key portraits and headshots.

When choosing a head shot photographer, make sure they have the skills and tools necessary to deliver a number of head shots in different styles to meet all your needs. If you’d like to discuss how we can help you obtain the head shots that will make you stand out from the crowd, please contact us.